


Learning how to recover emptied trash on a Mac can be a daunting challenge. Once the trash is emptied, the files are no longer accessible through the typical user interface. However, this doesn’t mean they’re forever lost.
Reliable software like Wondershare Recoverit offers an easy solution for restoring emptied trash on a Mac. This guide will introduce Recoverit as the go-to tool and outline four more free methods to help you restore your deleted files. Can you recover emptied trash on a Mac? Find out below!

Using Wondershare Recoverit To Recover Emptied Trash on Mac
Wondershare Recoverit is a top-tier solution for recovering emptied trash on a Mac. Its user-friendly design and robust features appeal to both casual and professional users. Recoverit is designed to retrieve lost files with ease, even from emptied trash. It saves you from the stress of data loss. Here’s why it stands out:
- Supports over 500 data loss scenarios
Recoverit can handle many data loss situations. It can restore accidental deletions, permanent file removal, system crashes, virus attacks, formatting errors, etc. The extensive coverage ensures you have a reliable tool, no matter the reason for your file loss.
- Recovers 1000+ file types
You can restore a vast range of files. It includes documents, photos, videos, audio files, emails, and even system files. This makes it an all-in-one solution for file recovery, whether it’s personal or professional data.
- High success rate of 99.5%
Recoverit boasts an impressive 99.5% success rate in recovering lost files. The reliability provides peace of mind, knowing your chances of retrieving valuable data are higher than with many free alternatives.
- Three simple steps for data recovery
Recoverit simplifies the recovery process into three straightforward steps. The tool is accessible even for users with no technical expertise.
How To Use Wondershare Recoverit To Recover Emptied Trash on Mac
To restore files using the free data recovery software, Recoverit, see the step-by-step guide below:
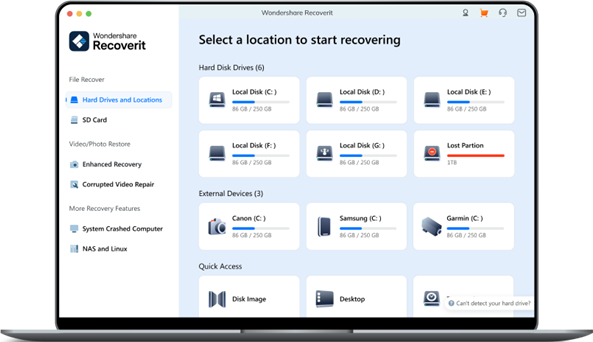
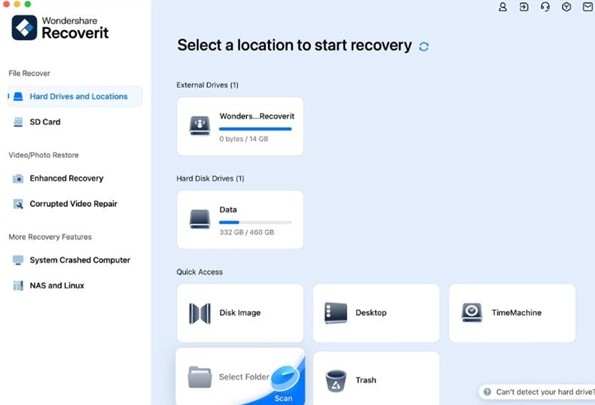
Step 1: Download and install Recoverit on your Mac. Launch the app and sign in or register a Wondershare account. Choose your Mac’s main drive to recover emptied trash.
Step 2: Click the Start button to begin the scanning process. You can monitor the scan in real time. Use filters to sort files by type (e.g., photos, documents) to narrow down your search.

Step 3: Preview and Recover Files
Once the scan completes, you’ll see a list of recoverable files. Preview the files by double-clicking them to verify their contents. Select the files you want to restore. Click Recover, and choose a secure location (different from the original location) to save them.

Follow the steps above to quickly recover deleted files from emptied trash on your Mac. With its high success rate and easy process, Recoverit is the best option for data recovery.
4 Free Methods To Recover Emptied Trash on Mac
While Recoverit is the most reliable solution, there are also free methods you can try. These options can be alternative ways before investing in a professional tool. Here’s how you can restore deleted files using built-in features or other free solutions:
Method 1: Using Time Machine Backup
Time Machine is a built-in backup feature on Mac that regularly saves snapshots of your files. It’s an excellent option for recovering deleted data. If you’ve been using Time Machine, you might be able to restore files even after emptying the trash. Follow the steps:
Step 1: Connect the external hard drive or backup device used for the Time Machine.
Step 2: Go to the Time Machine menu from the top bar and click Browse Time Machine Backups. This opens the Time Machine interface, where you can go through different backup dates.

Step 3: Search through your backups to find the files you want to recover. Select the files and click Restore to bring them back to their original location.

Method 2: Command-Line Recovery (Using Terminal)
The Terminal on Mac can recover deleted files using command-line inputs. While it’s not the easiest method, it can be helpful for users familiar with basic commands. This method can attempt to locate files still on the hard drive. However, it’s less reliable than specialized software like Recoverit. Here’s how:
Step 1: Go to Applications > Utilities > Terminal to open the Terminal window.
Step 2: Type the following command: cd.Trash. This command searches for files in the trash directory. Type Is to list all files in the Trash folder.
Step 3: If any files are found, use the mv command to move them back to the desired location. Here’s an example: mv /path/to/file /new/location/
Method 3: Checking Cloud Storage (e.g., iCloud)
Do you have cloud syncing enabled (e.g., iCloud, Google Drive)? If so, there’s a chance that your files are saved in the cloud even after being deleted from your Mac. Cloud storage services often keep a backup for a certain period, allowing you to restore them. Here are the steps:
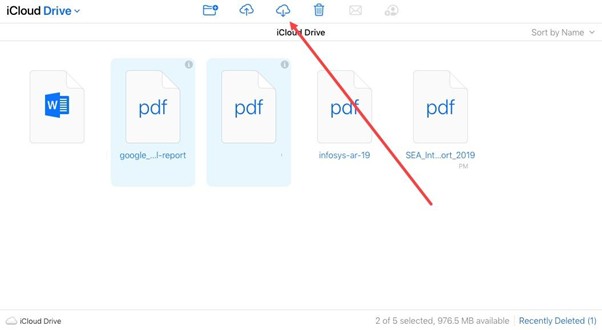
Step 1: Go to iCloud and Open iCloud Drive. Log into your account on a browser. For Google Drive, go to drive.google.com.

Step 2: Go to the Recently Deleted folder (available in both iCloud and Google Drive). If you find the file, select it and click Restore. Once restored, download the file back to your Mac.
Method 4: Using Other Mac-Compatible Freeware
Several free file recovery tools are available for Mac that offer basic features. While not as robust as Recoverit, they can still help retrieve files in certain cases:
PhotoRec
PhotoRec is an open-source program known for recovering various file types. It has a command-line interface, making it more suited for tech-savvy users.
Disk Drill (Free Version)
Disk Drill provides basic data recovery for free, but it has some limitations. It offers a ease-to-use interface and a fast scan option.
These methods offer varying levels of success rate and ease of use. Time Machine and cloud storage are ideal for regular backups. However, the Terminal and free tools might need more technical skills and may not guarantee full recovery. For a reliable, high-success solution, Recoverit remains the best choice.
Comparison of Methods and Their Pros & Cons
When recovering emptied trash on a Mac, choosing the right method is important. Here are the pros and cons of each approach to help you decide the best option for your needs:
| Method | Ease of Use | Effectiveness | Reliability | Limitations |
| Wondershare Recoverit | Very easy (3 steps) | High (99.5% success rate) | Most reliable | Needs installation |
| Time Machine | Easy (if set up) | High (if a backup exists) | Very reliable with regular backups | Needs prior backup setup |
| Command-Line Recovery (Terminal) | Moderate (for tech users) | Low to moderate | Limited reliability | Needs technical knowledge |
| Cloud Storage (iCloud/Google Drive) | Easy (if synced) | Moderate | Reliable if files are synced | Limited to synced files |
| Free Mac-Compatible Recovery Tools | Easy to moderate | Low to moderate | Varies by tool | Limited features and file recovery scope |
As seen in the table, Recoverit offers the most comprehensive and reliable solution. It can recover emptied trash on Mac, especially when other methods fall short. For professional-level recovery with ease of use, Recoverit is the best option.
Conclusion
Recovering files from emptied trash on a Mac can be challenging. However, with the right tools and methods, you can restore your data. While free options like Time Machine and Terminal are helpful, they may not always guarantee success.
Recoverit is the top choice for a reliable and hassle-free recovery process. Its high success rate and easy-to-use features make it the best solution to recover files from emptied trash on Mac. Give it a try for a seamless restore of your deleted files.


